This page is currently being checked for spelling, and other, mistakes. It should be already understandable but will be updated in a while.
Designing
| Table of contents |
|---|
General
For most people, Elma usually just means playing; driving the bike and beating your own and other peoples times. But actually that's not whole truth, Elma is alot more than that. The other very important thing is that you can also design levels. The activity of level designers in the scene make alot of contests possible, without them, there wouldn't be much to play now would there? Level designing is a pretty personal thing, some like to plan, others like to just go with what they happen to come up with. Some levels need to be more detailed - like the ones competing for LOM title. Some designers like to use different textures to give more detail, others use polygons within polygons to add detail to their levs - a technique that is pretty good because it makes no difference in appearance which LGR a player is using. On this page you can read and learn about basics of designing as well as advanced methods used by different level designers in the scene.
Both Elma and Across have a built-in level editor. In this section we'll only discuss the use of Elma's level editor - eventhough the editors don't differ radically. The editor itself is rather easy to use, and if you don't quite get it, there is always the readme.txt that you can consult for basic instructions on how to use it. In addition, you can get some more information by clicking the right mouse button on the tools in the level editor, doing so displays a short summary of level editor commands that can also be read in Zworzy's Elma programs guide.
A guy, named Nicolas, has programmed another level editor: Alternative Level Editor 2 (ALE guide). ALE2 is something you should seriously consider on using and learning, that is, if you're seriously considering on learning how to design your own levels, because it has a nicer user interface and many useful additional features - such as copying or moving polygons. There are several designers who are more keen on using the level editor that Elma has.
Tips
Here are some tips to get you started in level designing. The goal is, that every starting designer would read this and avoid the usual mistakes. The original text was made by psy.
- The most important thing to do is play-testing. Play the level many times, see if you can do something better, then change it and play again and again, however, do not go too far with fine-tuning or the level will be too polished and there are no obstacles left to hoyl. Try to get a good balance; make it ergonomic and fun to play but still hard to drive perfectly.
- Be original. Many designers have their trademark styles and tricks, you can try to make your own too. However, reinventing the wheel is pointless, that's why you should play as many levels as possible to get inspiration.
- Detailed backgrounds give headache to some players, so if you definately want to use such ugly thing as brick as your background, at least use mask so it won't move like backgrounds (and others can turn pictures off). But it's really recommended to use sky background, because the other choices in Default.lgr are just too confusing for serious hoyling. If you're using some other LGR, the basic idea is to get enough contrast between the back and foregrounds. You must also choose a background where you can see your bike's wheels clearly. In version 1.2 this isn't a problem anymore because the patch allows you to force the ground and sky to default ones.
- Did you know that there are many players that hate gravity? If you really have to use gravity food, you should put an arrow polygon or something to show which gravity it'll switch on. Avoid messy places with many different gravity apples. A little use of gravity won't ruin a level, just keep it small enough and don't play around with it.
- When adding new polygons, like uphills and so on, add them to the main polygon. If you don't, the wheels will stuck or disturb playing in many other ways.
- You might want people to find your levels tempting? You could drive a few times to the top list. Some people feel like they just have to break them.
- Don't block your vision with pictures. Using pictures right will make the level look very good without disturbing the play. Some people hide small polygons behind pictures to get the picture work like a polygon. Just remember to make the lines fat enough so people with low details (no pictures) can see them too.
- Always name your level (Properties). I made a best time in unnamed, not so nice, eh? Try to invent different level names. Too Easy or anything that's related to the difficulty is pretty dull. This is my first level or This level was made by psy are also as good as Unnamed. Also include the level number in the level name so people don't have to try to remember the number when saving the best time replay.
- Name your level files so that they can be found from the same place like Jappe001.lev, Jappe002.lev etc., not like forest.lev, mountain.lev. People might have thousands of levels in the same lev directory and it will be hard to find them all otherwise.
- The majority's opinion of the suitable length for a hoylable level is 30-80 seconds. Shorter than 30 secs often get boring pretty fast and longer than 80 secs are a bit too much for a compo. If you prefer relaxing cruise levels, 2-3 mins is probably a good length. Longer than that are a pain really.
- When you start playing, you might think that big downhills, big loops and speed is cool. Too bad that hardly no one thinks so after a few months of playing. So, you really should play the game for a few months first, then make the levels.
- When you think you're out of ideas, stop the level there. Don't try to make it longer with slaloms or loops or whatever boring stuff.
- Make interesting starts. Falling down for 10 secs isn't interesting, neither is plane ground. Put something there. When someone plays a levelpack, they use approximately 2 seconds per level. If there's nothing in the start, ESC, next...
- Do not use invisible polygons as help for big jumps etc. They always mess up the drive. People might try to make over with some spin, and the result is hitting their head in an invisible polygon. Without it they would've made it. They'll be frustrated enough to switch to the next level.
- When publishing levels, make sure you've moved the start back to it's own place. This may sound stupid, but a lot of people are forgetting this sometimes.
- Food object is meant to use in places you want the player to go, so he cant use a shortcut etc. Do not use them if you really don't have to. And place them in such places the player won't drive through them. Same goes for killers, you can block some passages if you want but dont overuse it.
- Please spare us from your cool autolevels. It should be a game, not a movie.
- In case you want to deposit the exact start position during testing the other parts of the level, you can add an apple in maximum zoom next to start (like one pixel further so you can still draw off the start). Then it will be very easy to replace the start to its exact position.
Basic tricks
The basics (such as making vertices and polygons, adding objects, using zoom and move) are told well enough in the game itself so we won't seize on them. In stead of basics, we concentrate here on more advanced features which are not so trivial.
Grass
Grass divides opinions. Some people say that grass hurts their eyes, the others that it makes the level looking much better and improves the playability. Grass is a cheap indicator to evaluate whether the level is any good at all. If you find some grass there, at least some effort has been put into it. And hey, you can always disable it by using the low details.
The thickness of the grass varies between designers. Most people prefer thin grass, because usually it looks better than a thick one. The thickness also depends on the level. In wide open areas you might use thicker grass than in small levels. And of course the different grass styles have a design aspect.
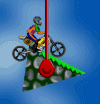
A grass polygon can be made by clicking in the level editor create vertex and then select Move and right click on the polygon and select Grass polygon: YES. In the adjacent picture we see how the grass polygon must be made. Notice that the level doesn't have grass on the steep wall, because the grass can't rise steeply. The most common problem of malfunctioning grass is that you have wrong side of the grass polygon inactive. To correct this problem, make sure that the longest line in x-direction (horizontally) is at the upper side of the grass polygon. If the grass overflows to the adjacent wall or ceiling, you can cover it by using masks. Just ensure that the mask's distance is under 600 so that it's in front of the grass.
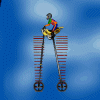
The correct distance for mask covering grass is between 500 (kuski) and 600 (grass). In the following picture there is an example what happens if you set the distance below 500. In the first spike there is a mask which distance is over 600, in the middle spike the mask distance is 550 and in the spike where the bike is the distance is 400.
When making grass polygons, it's useful to remember the shortcut keys space and enter, which changes the directions of the vertices. A grass polygon can cross itself or other polygons. If you are using the shareware version of the game, the limit (5) of polygons may be a problem, but in the full version you don't have to worry about; the polygon limit is 300 and vertex limit is 1000 (picture limit is 5000 and object limit is 50).
If you don't bother to add grasses yourself, you can use ALE 2's Autograss feature. Just click the button AutoGrass and then the polygon on which you want the grass to be added. The program then asks you some questions like the thickness of the grass. It's very easy to put grasses in this way, but you have to manually check the corners, because ALE tends to set the grass so that it crosses the wall or ceiling.
With grass polygons you can make two kinds of special grasses: solid grass and grass tree. In the level editor, they look exactly the same. The thing is the order in which you make those grass polygons. To get the grass tree as in the left peak, you have to do the top grass polygon first and the lowest polygon last. And to get the grass tree as in the right peak, you have to start from bottom and proceed upwards.
Example levels: design01.lev, design02.lev, design08.lev
Pictures and masks
When adding pictures, you should always think about playability. Don't place pictures to critical spots where you should see exactly where the ground is.
Whenever you set a picture, it would be preferred to change the picture distance so that it's over 500. This way the kuski will be always in front of the pictures. Eventhough this is not very important since Elma 1.2 was released; it has a feature Pictures in background which moves all the pictures automatically to the background. In the following screenshot the other picture's distance is over 500 and the other is under 500, and we get an effect that the kuski is driving between those bushes.
By adding a mask, you can change polygons color. Notice the pictures' clipping too. In the previous picture those bushes clipping was S (meaning sky). It means that they can be seen in the sky only, not in the ground. In the following picture the suspension pole's clipping is U (unclipped), which means it can be seen in the ground and sky. The third alternative is G (ground), which means that the picture can only be seen on ground. If the game crashes while you change the clipping, it means that you have an old version of Elma 1.2, please upgrade to the newest version.
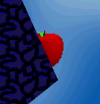
You can also use masks and pictures to hide an apple or the flower. Remember when doing this that some people might have the option Default ground and sky on, and if we had brick background and you would add brick masks those people would see those pictures weirdly.
Example levels: design04.lev
Gravity
First of all: don't use gravity. Still, if you do, try to use it as little as possible. However gravity is very easy to make, the gravity effect is made by special, gravity, apples. To add a gravity apple, just create a normal apple and then select Move and click the apple with right mouse button. Then you can choose which gravity you want. If you make a gravity apple, you should make a little arrow next to the apple to show which direction the gravity is.
Usually, if there is gravity in a level, it means that there is some weakness in the design and you should edit the level and try to get rid of gravity apples. Still, gravity doesn't necessarily ruin the level if it's used just slightly and there is no any hard pipes or tricks during gravity.
Example levels: design03.lev
Invisibility
Invisibility is one of those things you should never make. Still, we present here how to make, just that you could avoid doing the same. To make an invisible wall, you just have to make a really thin polygon. Zoom in and move the polygon's vertices very close to each others.
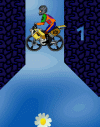
Invisibility can be also made by masks. The point is, that you add ground masks and change their clipping to sky. After that both the sky and ground look like ground and you can't anymore know where is ground and where is sky. After that you can make some parts visible by colouring them with different mask. In the following picture there is an invisible wall under the bike.
Example levels: design04.lev, design05.lev, design06.lev
Launchers
If your wheels are in a very tight rail, you can get a lot of speed by braking. Avoid banging your head by letting the brake off and rotating the bike. The trick is called launcher. There is again some variation in computers.
By creating many thin polygons at the start of a level, you can generate a boost and lot of speed. Though this may sound nice, think twice. It's not very nice way to start your level, especially because computers behave in different ways due to graphic card settings and so on (more on the Tweaking).
Example levels: design07.lev
Advanced tricks
Picture art
By changing pictures' clipping, you can for example make routes to secret areas. These secret areas can be seen from navigator, or if you are playing with low details.
By pictures and masks, changing clipping, you can make polygons of different colours and for instance water looking areas.
G/U clipping makes it possible to create stoned figures. They are very arduous to make because you have to make a polygon which adapts the picture.
LOM levels introduce several great examples of creative picture usage in design.
Example levels: design04.lev, design05.lev
Multiflowers
With ALE 2 you can make as many flowers as you want. The only limit is the limit of objects (50). In ALE 2, just press create object, right click on the level and select flower. While playing, after you have collected all the apples, just touch one of the flowers and you'll finish the level. With this trick you can get more style variations in your levels.
Example levels: design12.lev
Pick and skip
There is a bug in the game which lets you to finish the level even if you haven't taken all the apples. This bug is also know as Hooked-bug. It happens when you take an apple exactly at the same time with both wheels (or with a wheel and head). When you take an apple like that, the game counts it twice letting you to skip one apple. You can use this bug for your advantage when making levels. It's made by making the start in tight pipe so that the wheels are close enough to each other and placing an apple between the wheels. So the apple is automaticly taken with two wheels and the bug is proceed.
It's a good habit to write next to start how many apples you have to take in the level. You can calculate it by counting all the other apples and substracting from it the amount of apples in the start. For example, if you have 30 apples around in the level and 5 apples in the start (totally 35) you write 25 (30-5) because that's the amount of the apples you have to take by yourself. This isn't considered cheating because the player can't avoid taking those start apples so it's same for everybody. But in levels like Hooked where there are no such start apples, to get this kind of bug is a bad thing and you should remove your times with BRemover. This trick was used first time in WCup512 by MP.
Example levels: design09.lev
Driving in ground
You can drive in ground by creating a small polygon around the front wheel central. Don't try to drive out of the level (of course you will try it after reading this), because there is nothing out there and the game just crashes if you go too far from polygons.
Example levels: design10.lev
Adding texts and figures
You can add text and figures by using Rad's Levelmaker (guide), a program which can convert BMP files to LEV files and vice versa. Just make a picture and write some text in it and then convert it to level file. To add text to an existing level, use ALE 2's import level feature: first load the existing level into ALE, then press import level and choose the level (outlev.lev) which you have made with Rad's Levelmaker. Press select before importing if you want to move the text.
Example levels: design11.lev
Horizontal and vertical lines
Sometimes, when you are making level and create a horizontal or vertical line, it doesn't seem to be straight anymore in the level. The problem is caused because of different zoom levels. To correct the problem, just adjust the zoom level so that you can see both ends of the line, then touch them (click them two times with Move), and they should be correctly aligned.
Example levels: design11.lev
Remixes of internal levels
You can convert internal levels into external levels by saving a level as qwquu0xx.lev in level editor, for example qwquu001.lev (Warm Up) and pressing Save and Play. After that you can save the level for example as mymix001.lev and edit it. If you want to merge two (or more) levels, use ALE 2's Import Level. You may have to use the polygon merging by pressing Polygon Operations, pressing the polygons you want to merge and select Merge.
Example levels: design01.lev, design02.lev
¬ NOTE
This website (Moposite) has been in hibernation since c. 2006.
Still active parts:
- WR table
- Across WR table
- Special levels
- Mopolauta forum
- Archive ACTIVE
- Total times (HOT)
- History (research)
Elsewhere:
- Speedrun (34:21,73) (44/54 WR)
- Elma Online (EOL)
- Across WR statistics
- Official website
- Discord chat and #across (IRCnet)
2025-06-15


